"Chopping Board" Raspberry Pi Cluster
Posted on January 10, 2022 at 18:12 by GreenFrog
Time has come to finally give my K3s cluster, LMDS Development Env and OMV NAS some form of unity, so they don't clutter my desk as much. As I don't have a 3D printer on hand, I had to improvise. I needed some cheap and easy to work with material that can be cut and drilled without any special tools. Normally there are only two materials that comes to mind - wood and plastic.
Cutting wood using hand tools on a kitchen table won't be particularly precised job and for small pieces also difficult to do, this is why I decided to go with plastic. I was looking for acrylic sheets but they aren't cheap for required thickens, also not easy to cut.
One day while cooking a thought came to mind - how would a plastic cheap chopping board work as a framing for the cluster rig? Not thinking to much more, went to the euro shop, or as you call them in US a dollar store and found a chopping board with right dimension. Bought also some bolts and nuts and started planing my cuts, looking if all will fit, cables, fan, SBCs etc.
Materials
Generally idea was to make it all cheaply and reuse what I already had around the house. I wanted to create something that cannot be easily broken while moving and something that is aesthetically acceptable to be standing on my desk.
The best part of the project was to figure out what can I use to build it from, how all that should be put together and wired around? Sometimes figuring out how to reuse things that intended purpose is different than you want them to serve is more rewarding that buying all precut and fabricated for you. The down site of DIY is that all the work require time and if you don't have it then save yourself a frustration and buy something half made.
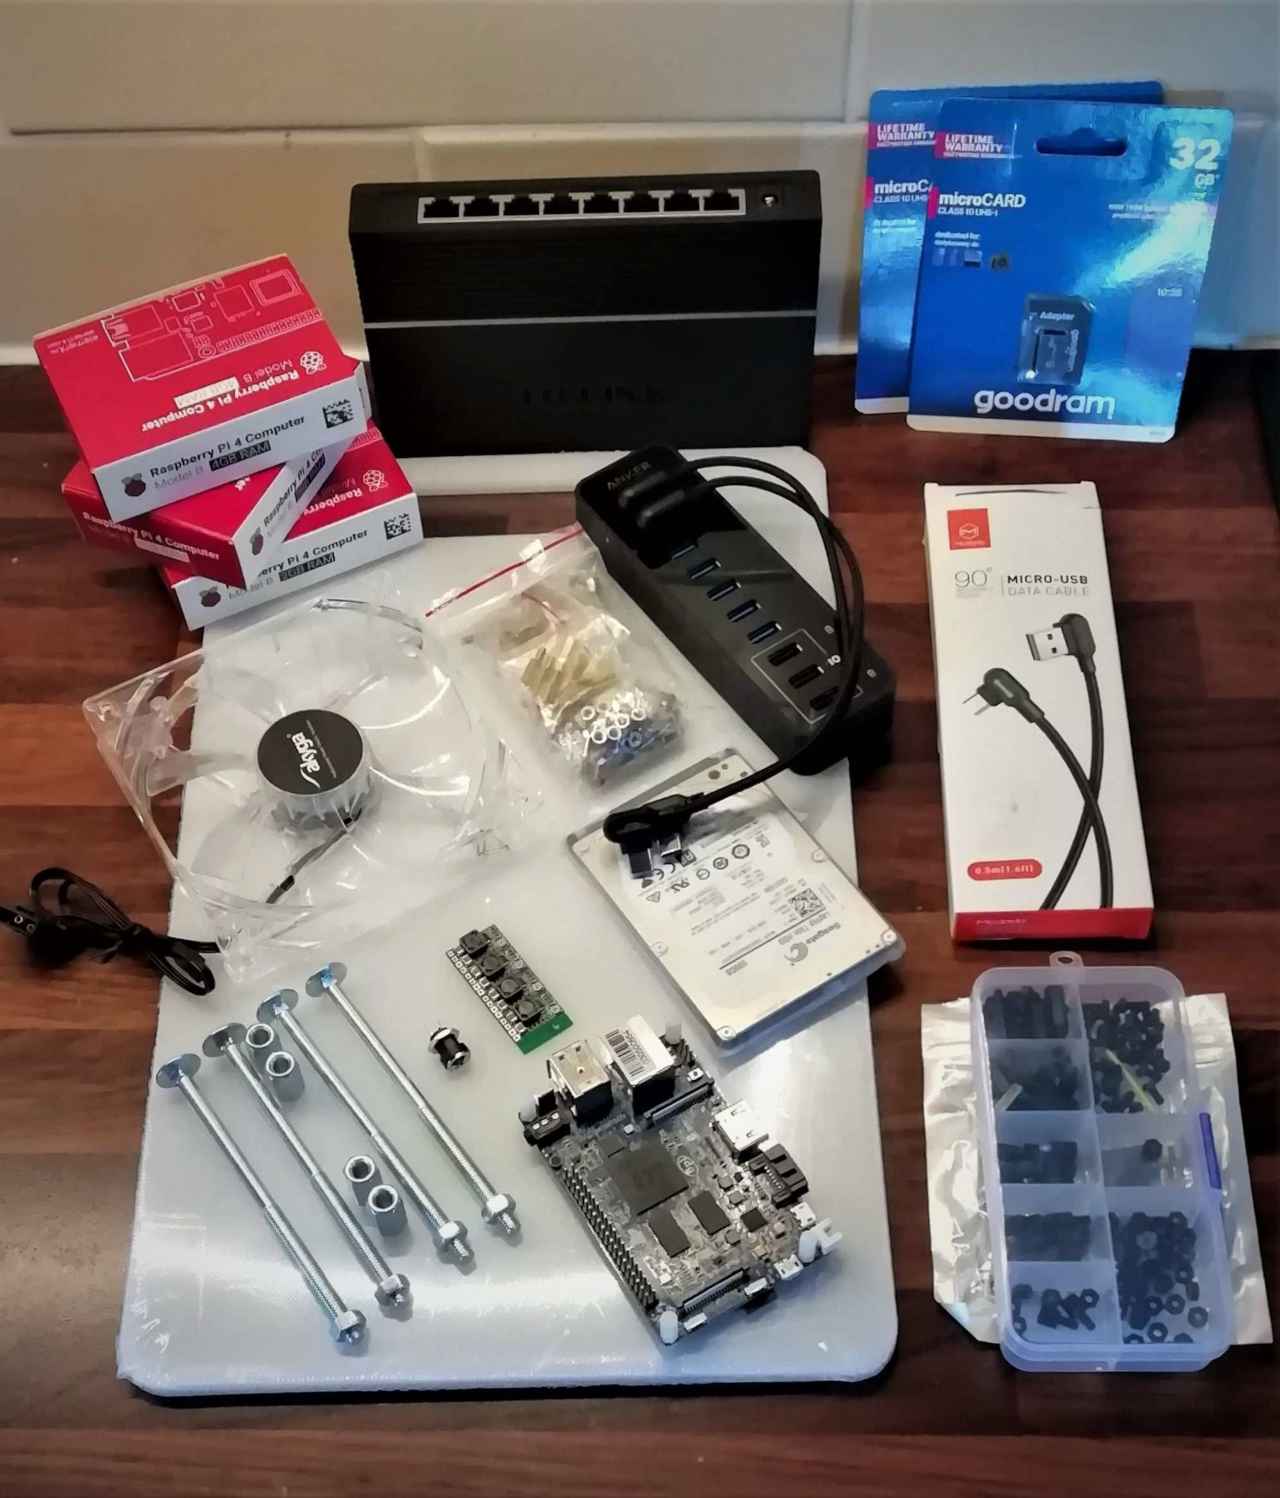
- Chopping board x 1
- Long cabinet bolts and nuts x 4
- Plastic pipe big enough that bolt can go through
- Two way rocker switch (fan speed selector)
- Buck converter (power regulator that lowering voltage from 12V to about 4V allowing me to reduce fan speed making it silent.
- 120mm fan x 1
- Raspberry Pis - 4 x RPi4 and old BananaPi M2 with SATA port
- SD Cards x 4
- USB cables (25cm or 50cm long) 3A power delivery capable
- Gigabit Switch x 1
- USB Hub x 1
- Plastic standoffs
- Some wires and barrel connector
- Some velcro, electric shrink rubes
- Network cable and RJ45 Connectors
Tools
- Drill and drill bits
- Metal cutting hand saw
- Soldering iron and some supplies
- Multimeter
- RJ45 crimping tool
Wiring
Wiring is quite simple.
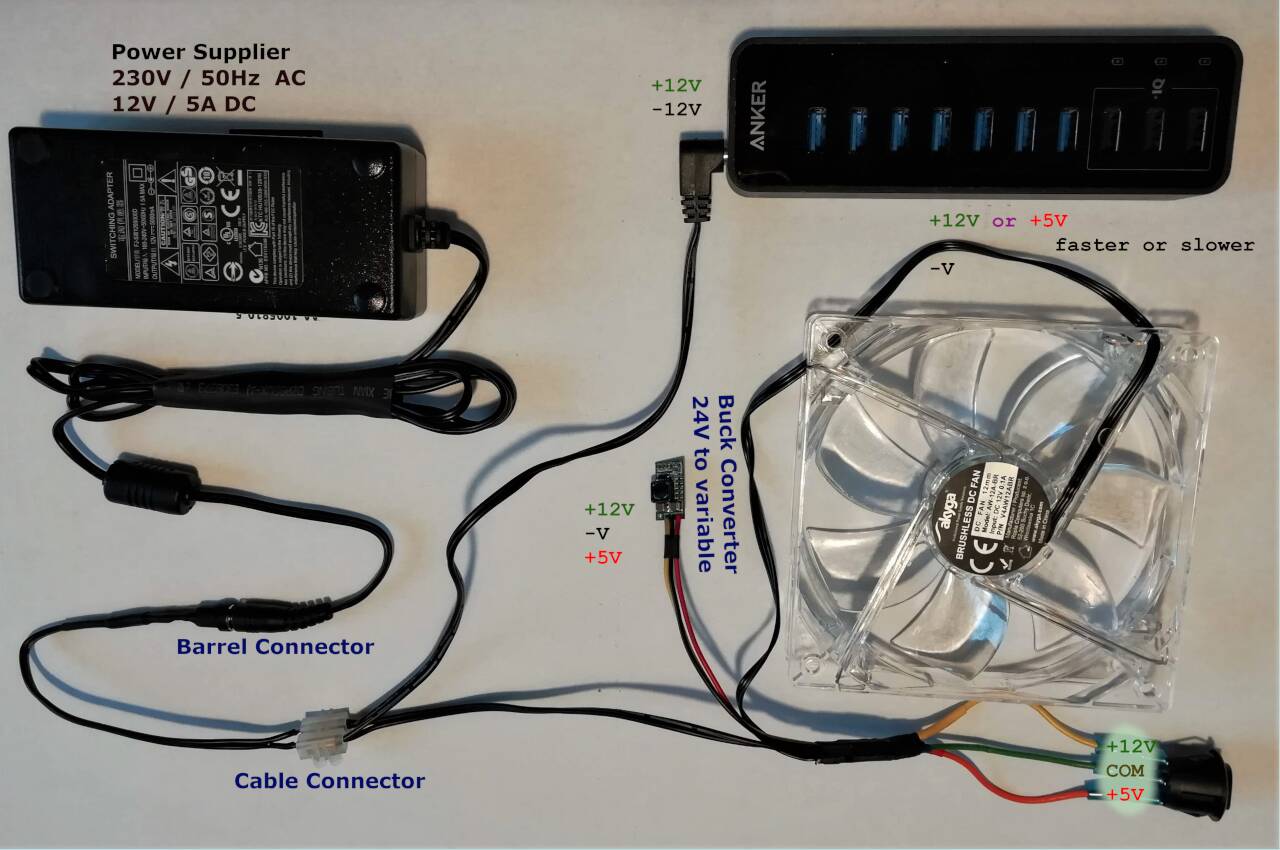
You need to know what is a buck converter and how to use it. In essence buck converter is a simple device that can limit voltage or current to certain values, values that you will set converter to yourself using screwdriver and measuring output with multimeter.
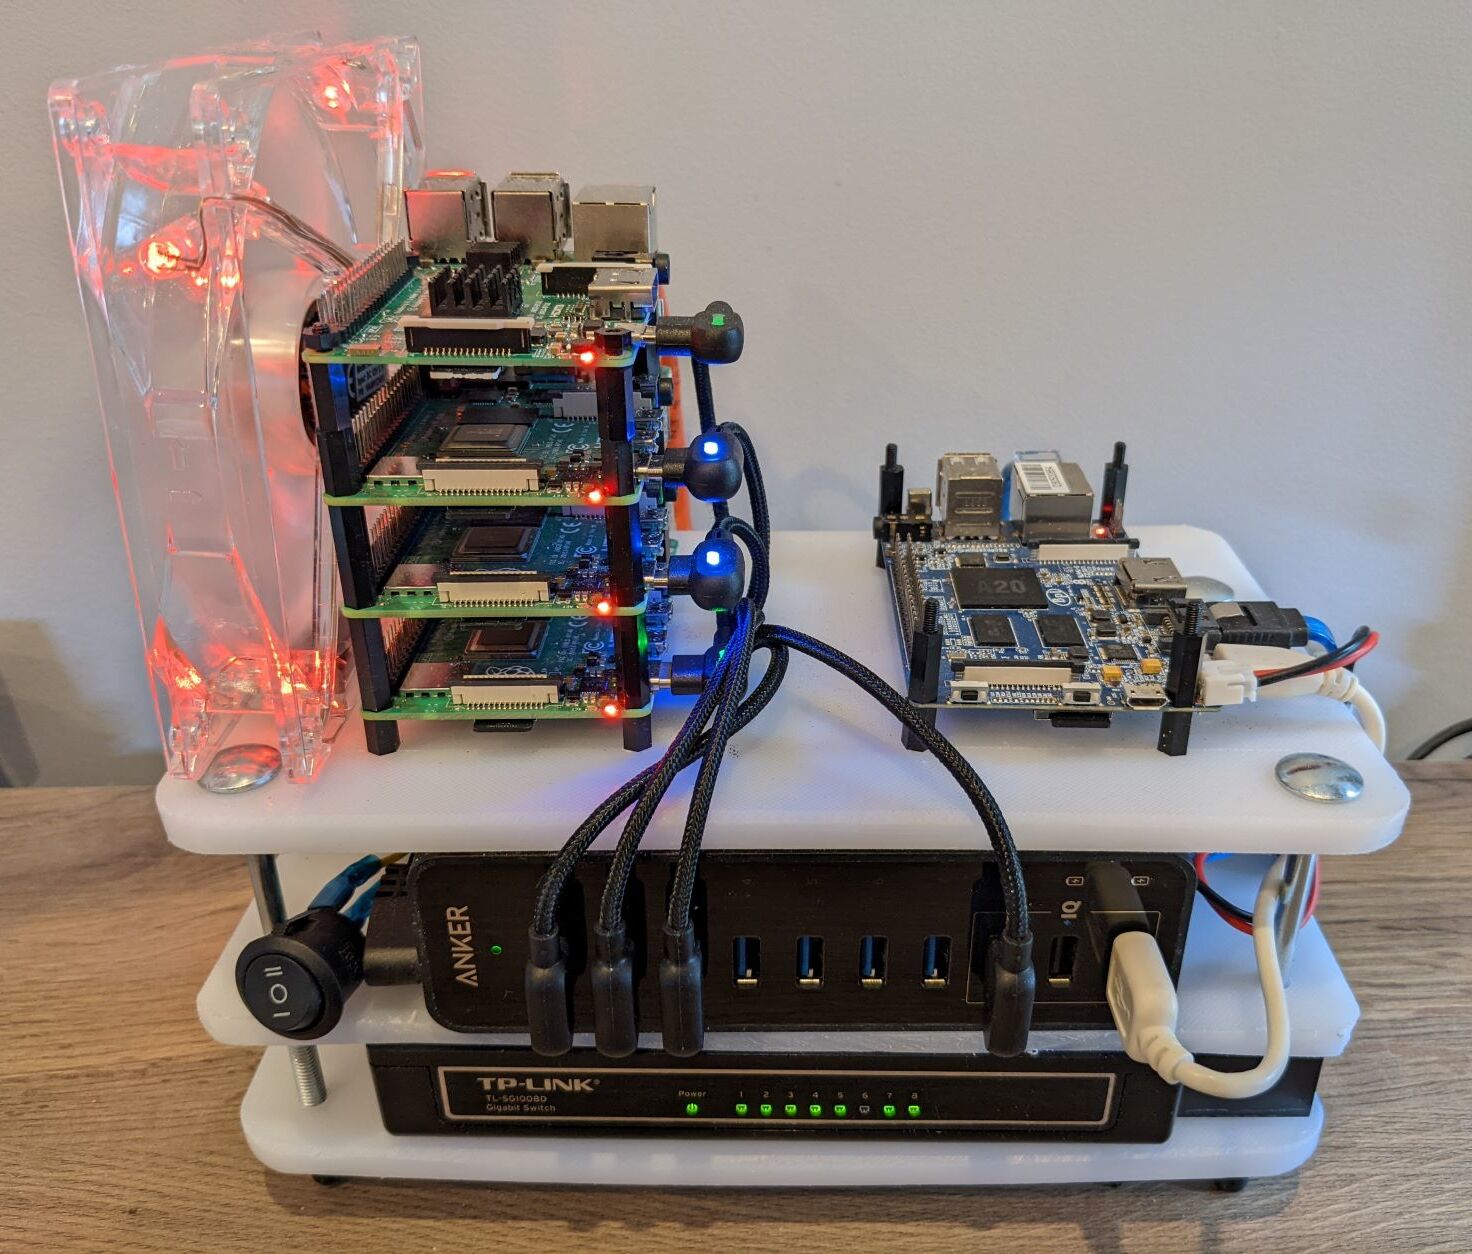
Having all above in mind this is how all got connected together
AC power from the wall outlet comes into PSU that converts it to 12V and is capable to deliver 5A - this is PSU that was initially powering up an USB hub alone. I am using this PSU to power USB hub and a fan that gets +12V or +5V depending from the switch position making fan go slower or faster - simplest possible solution without going with PWM - Pulse With Modulation fan and driver for it.
Network Switch is powered with another PSU as it also provide network to my laptop etc.
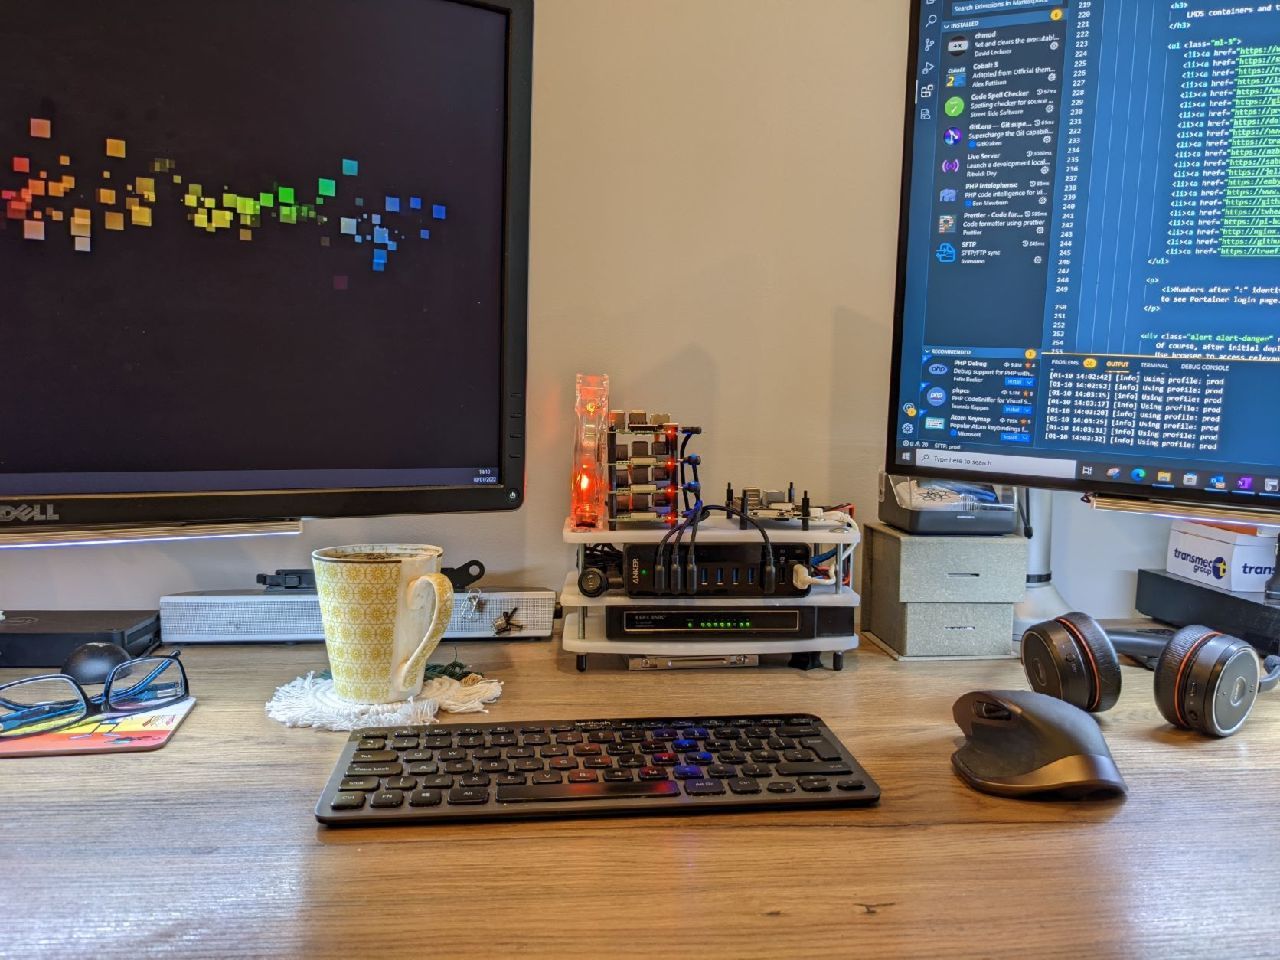
Result

Help me make LMDS better
With your support anything is possible
- Beginner
- Objectives
- Concept
- Hardware
- Hypervisor
- Hypervisor Manager
- Hypervisor Initial Config to be continued...
- Advanced
- My Quiet Lab
- Active
- Depreciated

Build your own Audiobook streaming system
Article will show you how to build Audible like streaming system based on Booksonic - audiobook streaming server and Subsonic phone app that let you listen audiobooks online anywhere you are.
Go to article