Home Lab Hypervisor initial configuration
Before deployment of any new VMs let's take care of few things first:
- Apply all the updates to XCP-ng host
- Download and upload all ISO files into XCP-ng host
- Install XCP-ng Center as alternate way of management
- Reduce RAM usage on XenOrchestra (XOA) VM
Update XCP-ng free unregistered version
When you first boot a new XCP-ng server and log into XenOrchestra (XOA) you will see that there are patches waiting to be applied, but in order to do that you might be required to register and opt for premium license. Of course registration is not necessary to update your XCP-ng system, on XenOrchestra (XOA) navigate to:
Home -> Hosts -> XCP-ng-lab -> Console
Log in to the console supplying root password and run:
yum update
Confirm update and restart system after update is completed. For more details follow this official article from XCP-ng team.
Uploading ISO files into the XCP-ng server
Download and install WinSCP on your local system.
Download Windows installation iso and all below:
While back it was easier to upload ISO files in to XCP-ng repository, but these days we need WinSCP in order to loud needed ISO files into the server for later use. Alternatively you could mount a network share with all the ISOs you need to the XCP-ng, but as you might not have external storage to share resources from, we will load all ISOs directly from your laptop to the local XCP-ng storage for now.
Using WinSCP connect into your XCP-ng using SCP protocol and navigate to /media folder. While you are there, upload all the ISOs you need - Do not store more then 15GB there.
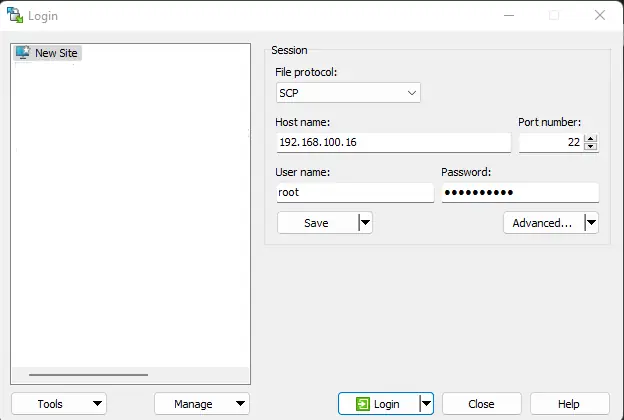 WinSCP connecting to XCP-ng
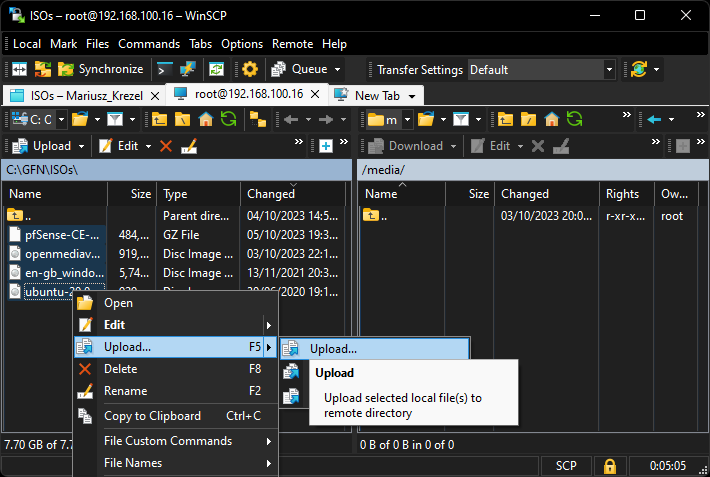 Uploading ISO into local XCP-ng storage
After you uploaded all the ISOs, go back to XenOrchestra (XOA) and navigate to New -> Storage and create ISO repository as shown below, selecting your host details.
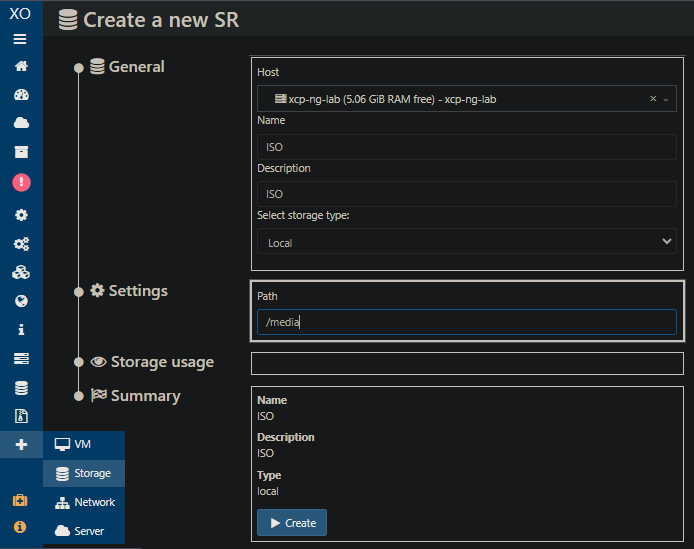 Creating local ISO storage on XCP-ng
After ISO Storage Resource is created, navigate to Home -> Storage select ISO and navigate to Disk tab, you shoudl see all the ISOs uploaded earlier.
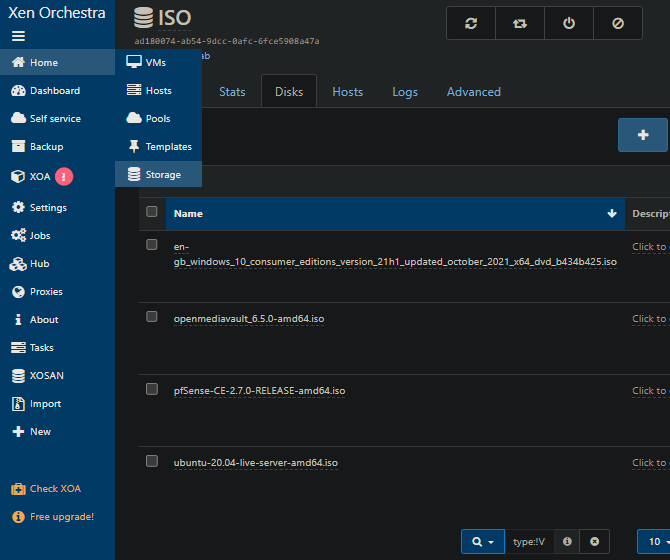 Uploaded ISO into local XCP-ng storage
Installing XCP-ng Center
There is an alternative to the XOA virtual appliance. In case your host is limited on RAM you might want to save its resources for other VMs and manage it using external client installed locally on your laptop, this way XOA VM can be deleted or never even installed. This alternative is called XCP-ng Center. Recent release can be downloaded from here
Simply download last version and install on your Windows machine. After successful installation add XCP-ng servers you want to manage.
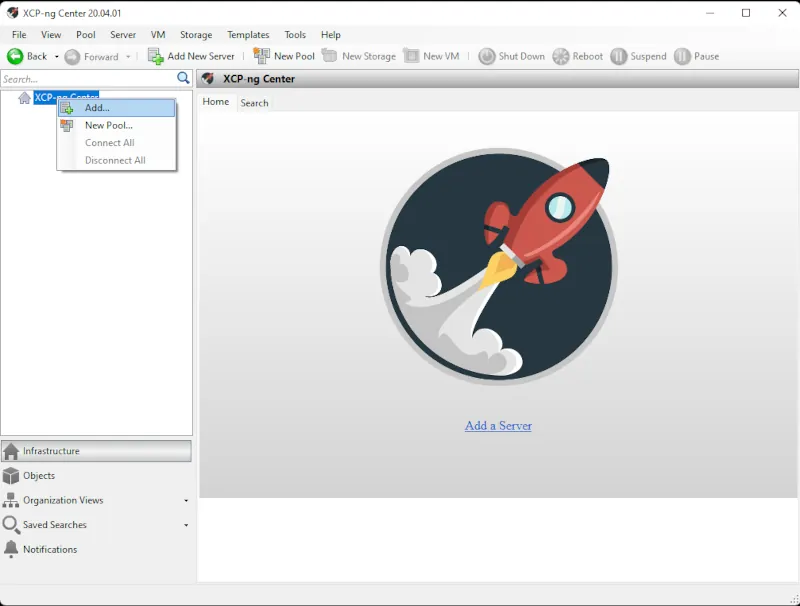 Adding XCP-ng host to XCP-ng Center
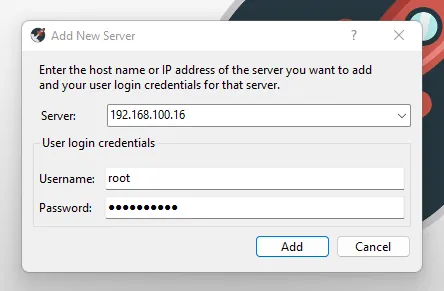 Connecting XCP-ng host to XCP-ng Center
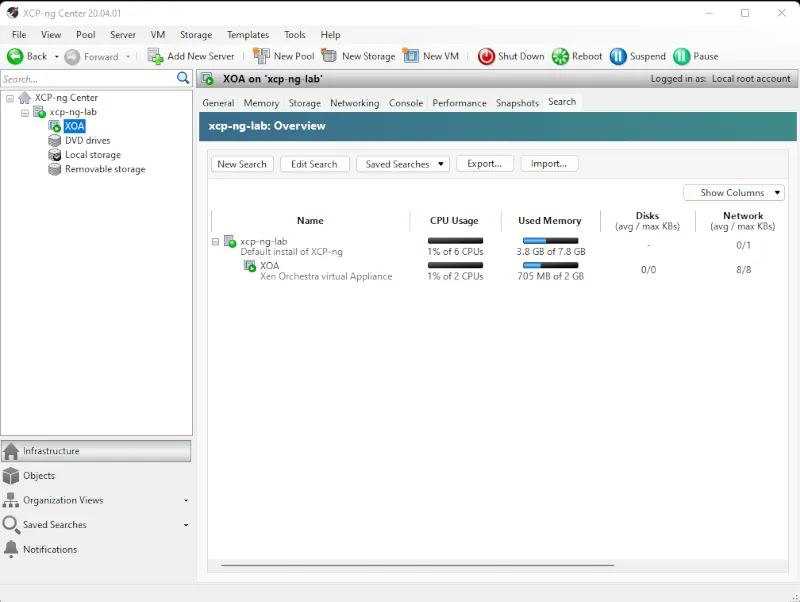 XCP-ng Center main screen
Reduce RAM usage on XenOrchestra (XOA) VM
As I mentioned earlier, you can delete XenOrchestra (XOA) VM and manage your XCP-ng with XCP-ng Center alone. This way you can save some resources if your system is limited on RAM or CPU power. We can also keep XOA VM switched off and reduce its RAM allowance in case we would like to power it on from time to time.
In order to reduce amount of RAM XOA is using open XCP-ng Center and power down XOA VM, then navigate to Memory tab and select Edit. Set 1GB or RAM fixed or give it dynamic range from as shown below.
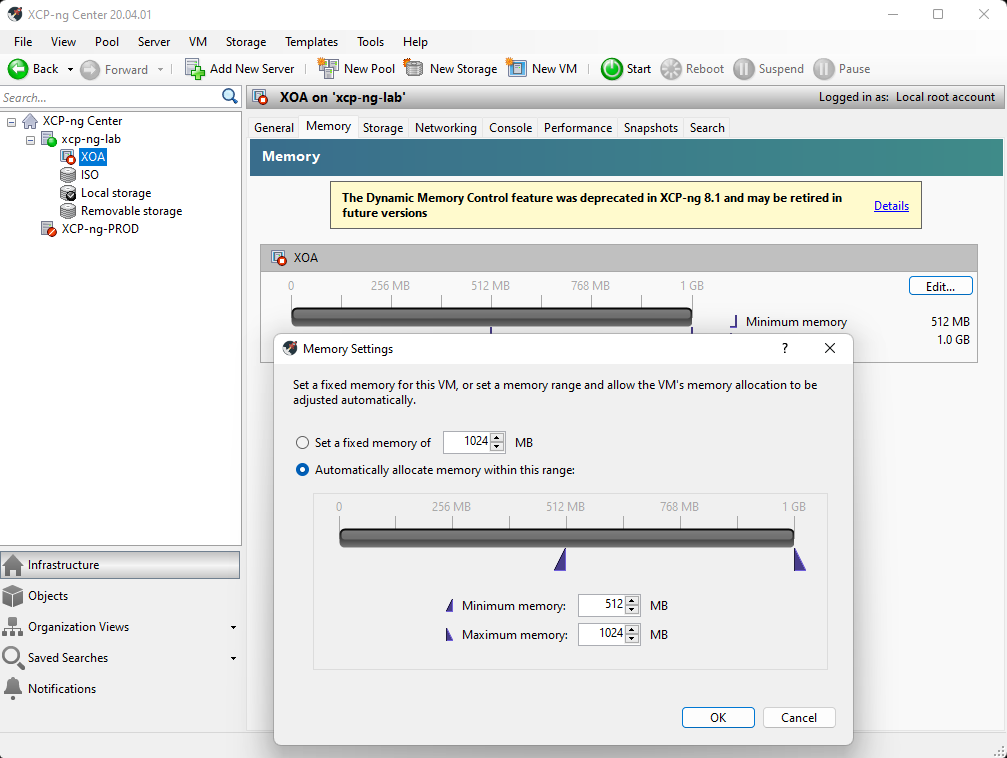 Adjusting XenOrchestra memory utilization
Save the settings and Start XOA VM if needed.

Help me make LMDS better
With your support anything is possible
- Beginner
- Objectives
- Concept
- Hardware
- Hypervisor
- Hypervisor Manager
- Hypervisor Initial Config to be continued...
- Advanced
- My Quiet Lab
- Active
- Depreciated

Build your own Audiobook streaming system
Article will show you how to build Audible like streaming system based on Booksonic - audiobook streaming server and Subsonic phone app that let you listen audiobooks online anywhere you are.
Go to article